how to make a cutout design on pottery glaze
Underglazes are an exciting medium to work with. Most polished potters use underglazes to give color to their pieces and create masterful designs. However, using underglazes can be challenging and sometimes confusing for beginners.
So, how do you use an underglaze? You can apply it on greenware (unfired pottery) or bisqueware (fired pottery before it's glazed.) Usually, a layer of transparent glaze is applied over the underglaze. There are a number of ways to put this paint-like substance on pots: dipping and brushing as well as drawing with tools like pens and crayons.
In this article, we will discuss a couple of methods of applying underglaze to your pottery and some tips to help you master Underglazing. But first, let's read about the composition of underglazes and their purpose.
Affiliate Disclaimer: We are ambassadors or affiliates for many of the brands we reference on the website. As an Amazon Associate, I earn from qualifying purchases.
What's the Purpose of Underglaze, and How Does It Work?
Underglazes are used to make designs on pottery and give it color. This color and design shows up on the final result. Underglazes are more vibrant and hued than regular colored glazes, so they can give a more bright and detailed look to pottery.
Underglazes are ceramic stains and oxides along with a small amount of Frit (silica and flux) and a medium consisting of clay and 1% gum that helps them adhere more to the pottery piece.
If you want a finished look and to make it safe for use as dinnerware, it's essential to coat your underglaze work with a layer of clear glaze. The clear does NOT have to be applied to the outside but must be applied to the inside of the vessel to make it food safe.
How Can You Apply Underglaze?
Traditional oxide underglazes should usually be applied to greenware. But most underglazes are suitable for greenware and bisqueware. I have not had a problem with using Underglazes at any stage of the clay.
There are multiple techniques to apply underglazes. Unlike glazes, you can use various colors of underglazes in a single layer and even mix colors to produce interesting results. It's all about ideas and creativity.
Here are some of the ways you can apply Underglaze:
Brushing
The most popular way to apply underglaze is by brushing. This Underglazing method has no specific rules or limits.
Brushing on Underglazes is so easy. It's very similar to painting and the underglaze dries REALLY FAST! You can use various brushes to achieve different looks.
Flat brushes can be used to color in different areas. Fan brushes can be used to add texture and nature-related patterns. Mop brushes can be used for blending. Round brushes can be used for detailing, drawing, and blending. Smaller brushes are used for delicate designs, and larger brushes are used for painting backgrounds.
Find your glaze brushes on our Best Glaze Brushes Page
You can create anything from a small fruit to a landscape with brushes. You should start with something simple, like a five-petalled flower. Apply a couple of layers.
Dipping
One of the easiest ways to apply underglaze is by dipping the piece in a bucket of underglaze. Dipping gives one whole layer. While underglazes are mainly used for accents and decorations they can also be used to cover your whole piece. Underglaze used in dipping is supposed to be quite fluid.
Here's a simple dipping method:
- Select a bucket large enough to accommodate the size of your pottery. Then fill with the right amount of underglaze.
- Make sure the underglaze is sieved. You may also have to water down your underglaze a bit to make it more fluid.
- Using tongs, grab your pottery piece and slowly dip it inside the bucket upside down.
- Make sure the whole piece is inside.
- Wait for 4-5 seconds and quickly pull out. If there's any fluid inside the pottery, pour it out.
- Keep the pottery in the air above the bucket for a minute so that all drips fall down.
- Go over the Dipping Tong marks and inaccuracies with cotton.
Use can underglaze the whole piece. You can either wipe off or apply wax resist on the part that will touch your kiln self. (Don't forget to wipe off any glaze that sticks to the wax resist) That's the great part of underglaze, you can put it on the bottom of your pottery and it will not stick to your kiln shelf unless the underglaze is too thick. Only one coat on the bottom that touches the kiln shelf is recommended.
Spraying
You can also apply underglazes by spraying. This can be done with spray guns or electric airbrushes. You can use spraying to create color blocks, gradient effects, splatter effects, spatter effects, and patterns. You might have to apply a couple of layers as fine mist doesn't show up very quickly.
Spraying is pretty straightforward. You have to load your air gun with liquid underglaze, attach a nozzle, and spray. Underglazes do need to be thinned down with water because it will clog the gun if it is too thick.
Putting your pottery on a banding wheel helps immensely. Hold the air gun steadily when spraying.
A great idea would be to use stencils. Put a stencil over your pottery and spray various colors to get a gorgeous effect.
Affiliate Disclaimer: We are ambassadors or affiliates for many of the brands we reference on the website. As an Amazon Associate, I earn from qualifying purchases.
Important Note: Make sure to wear a Dust Mask, and spray in a well-ventilated area or outdoors. Wearing goggles and latex gloves is also recommended.
Using Underglaze Pens, Crayons and Pencils
Using underglaze pens, crayons, and pencils helps produce much more polished results. It makes your pottery piece stand out. These mediums are also easy and fun to work with. They help you draw precise lines that move and melt slightly during firing, giving gorgeous results. Firing separately gives defined lines.
These mediums are similar and differ based on texture. Underglaze pens are like regular pens in that you draw defined lines, and their effect is much like ink. Underglaze crayons have a more pastel texture. You can smudge and blend them when working. Underglaze pencils contain clay and color that can be used for drawing and shading.
Bubble Underglazing
This is a fun unique way to use underglaze. Bubble glazing is the process of applying bubbles in underglazes to achieve different unique effects in ceramics.
To learn more about underglazing with bubbles read Bubble Glazing Technique
Also, watch the Bubble glazing Video
Carving
Carving is exactly what it sounds like. You use a sharp tool to carve shapes into the pottery before, during, and after Underglazing.
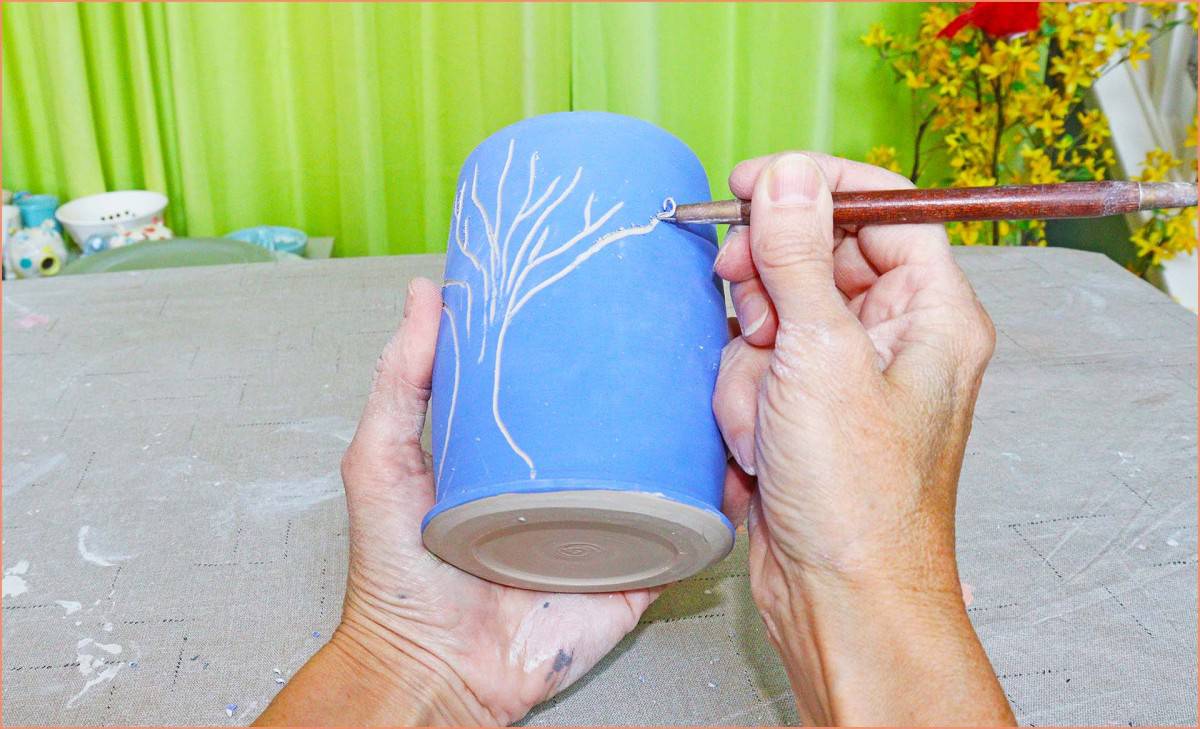
With carving, you can obtain geometrical shapes, patterns, and inside-out drawing effects. Also known as Scraffito, Mishima, Inlaying, and Mishima with wax resist.
Carving is pretty simple too. You can carve on leather hard clay and then apply underglaze so that texture shows up underneath color.
Also, carve over an underglaze area to carve out patterns that you can fill with other colors (make sure to coat the part you want to be protected with a layer of wax resist). After the underglaze is dry you can carve designs to reveal the layer beneath.
Sponges
Using sponges is another way you can apply underglaze. Sponge glazing is popular amongst Potters because it gives them the flexibility to create unique patterns and multilayer glaze. This technique only requires a synthetic or natural sponge with different cutout shapes or patterns.
For more information on this fun and easy technique Read Sponge Glazing Techniques.
You can also watch these two videos How to Underglaze with a Sponge – Pottery Glazing Tips Tools and Techniques
and Sponge Glazing Pottery with The Ombre Effect – Pottery Glazing Tips and Techniques
Tips for Using Underglazes
The color of the underglaze does change during the firing process
This means it'll show up with the color it had when it was in the container but a little more vibrant. Adding a clear glaze layer on top makes the color of the underglaze even more vibrant.
For an easy application, make sure your pottery structure is leather hard
You don't need to moisten Greenware. When working on a bisque-fired surface, you can go over the pottery with a damp sponge before you apply underglaze so that it adheres to the surface.
This also helps your applicator from sticking to the bisque ware that is quickly drying out the underglaze. Bisqueware loves to suck in the moisture. If you're working on a bone-dry surface, you could prime it first. As the surface is likely to absorb water but not as much as bisque ware, you can use diluted underglaze for priming and then decorate.
A banding wheel helps in applying underglazes
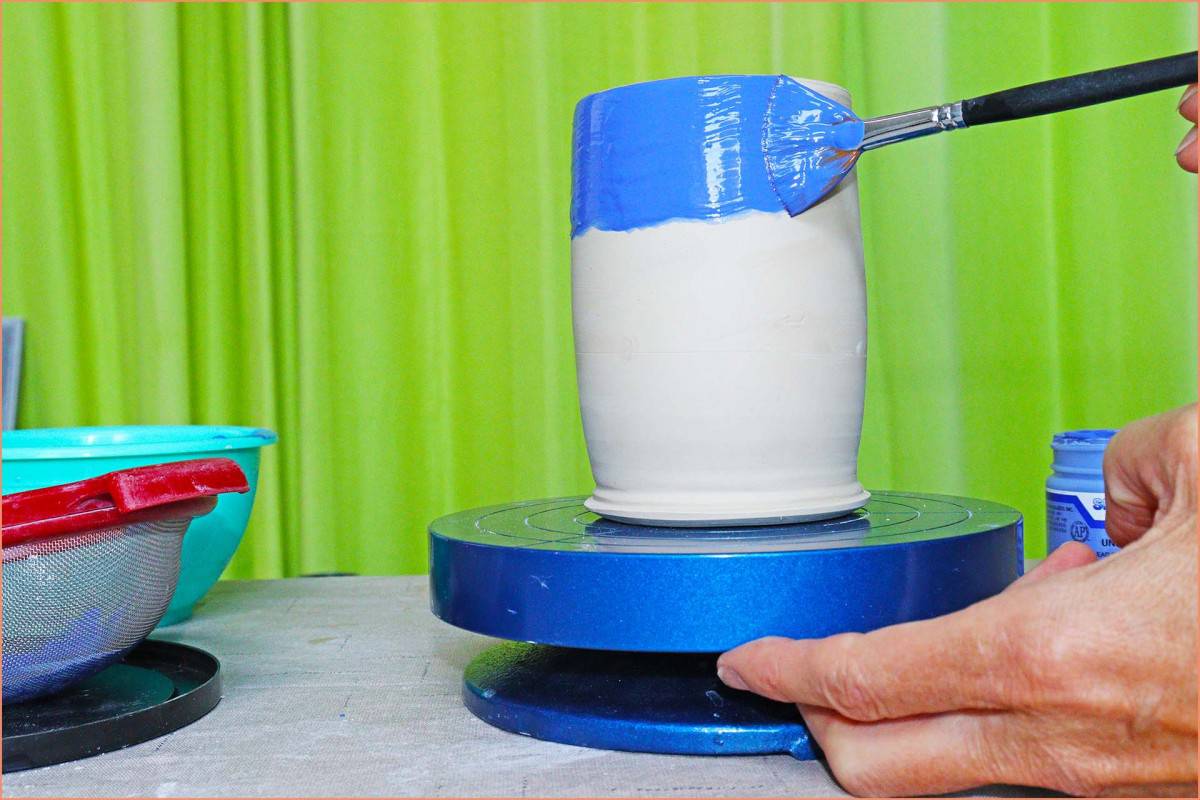
A Banding Wheel is a surface on a turntable that is flat. You can place your pottery on it and turn it around easily. You wouldn't have to worry about touching the surface and ruining it.
A solid, opaque underglaze result needs at least two layers
Most labels recommend three layers. You can apply one to two layers when making intricate, detailed patterns. You can change the number of layers in each part of your pottery, depending on the desired outcome.
Avoid applying underglazes on coarse or rough surfaces
Underglaze works the best on smooth pottery. You can use sandpaper to clean rough edges, although you should wear a Dust Mask while doing so. To reduce the amount of dust, wipe pottery with a slightly wet cloth.
To learn more about Underglazing Pottery read Underglazing Tips Tools and Ideas.
Conclusion
Underglazing is a fantastic way to add color to your pottery. It shows more color than glazes and gives otherwise dull-looking pottery a vibrant effect. Most professional potters underglaze their pottery, and is also fun and easy for beginners.
Underglazing basically demands your creativity. You can use brushing, spraying, dipping, carving, etc. to decorate with underglazes, but the design idea has to be yours. And don't worry if you mess up a little bit or don't get the desired outcome; underglazing is a learning process, and skills take time to develop. Just don't forget to have fun.
Sources
- Digital Fire- Underglaze
how to make a cutout design on pottery glaze
Source: https://potterycrafters.com/how-to-use-underglaze/